Introduction
U-part wigs are gaining all the attention in today’s day and age. This is because of how easy and how unique they are to use. They ensure maximum coverage of the scalp, so there are no giveaways. U-Part wigs with human hair also look great, that human hair element really shines when you use these wigs correctly. However, we have noticed that so many people do not know how to use these wigs, the right way.
Choosing the ideal wig can be difficult, even for the most devoted wig fans. Think of it like buying a car. Each one has a distinct set of features, and you can choose to buy the one that fits your basic requirements. Or the one with all the bells and whistles. However, deciding on the ideal wig for you ultimately comes down to considering what meets your needs. That, and what matches your style, and what fits your budget.

This is how important wigs are for most people. Thus, to expand your knowledge about them, we’re here. This article will tell you everything you need to know about U-Part wigs with human hair. Let’s get started.
Benefits of U-part wigs
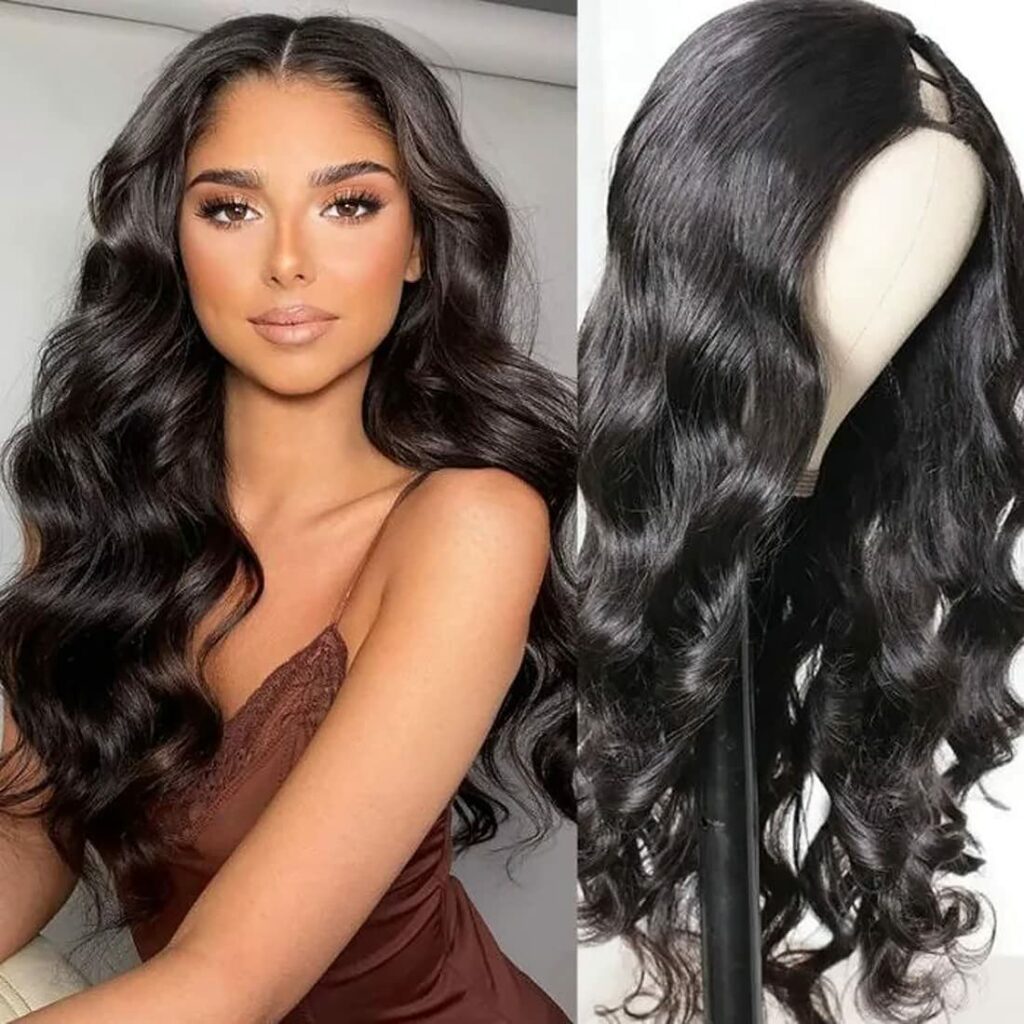
A wig having a tiny hole at the top or side in the shape of a U is a U-part wig. Many people also call it a U-part half wig. The hole allows you to move and merge your hair over your wig or attach a closure, giving you a hairdo that appears to be sprouting from your scalp! Here are some of the benefits of using U-part wigs that are really cool to know about.
They’re quite affordable
U-part wigs are less expensive than lace front wigs. Thus you can have some lovely hairstyles without spending a lot of money on a wig. So, U-part wigs are fantastic solutions for you if you have a tight budget. Who wants to go through the hassle of picking out wigs and then spending an arm and a leg for them? No one. That’s why U-part wigs are so great, they’re all about looking and feeling amazing without the excessive expense.
They have amazing quality
In today’s day and age, many wigs are actually being made from real human hair. This is because of how luxurious and unique human hair feels. Synthetic fiber of the past feels itchy and looks like your hair just came out of a paper shredder. This is why many people are not gravitating towards human hair wigs. U-part hair wigs are also now being made from real human hair. Plus, one of the biggest drawbacks for wigs with synthetic fibers was that you could not use any hair on them whatsoever. This was because the synthetic material would get burnt really easily. However, with human hair wigs, this is not the case. U-part wigs with human hair can be
- Curled,
- Straightened,
- Crimped,
- Bleached,
- Dyed,
- Anything you want.

Very easy to put on and take off
The U-part wigs don’t have a lace part. The entire wig cap is made by machines. As a result, you no longer need to cut lace and apply adhesive to attach it to your hairline, which is a difficult task for many beginners. Additionally, you can remove it before going to bed every night, giving your natural hair enough time to breathe. Additionally, it helps your own hair grow naturally.
In a nutshell, u-part wigs are more modestly priced and ideal for beginners. You will look lovely thanks to the wonderful wigs.
How to put a U-part wig in 5 easy steps
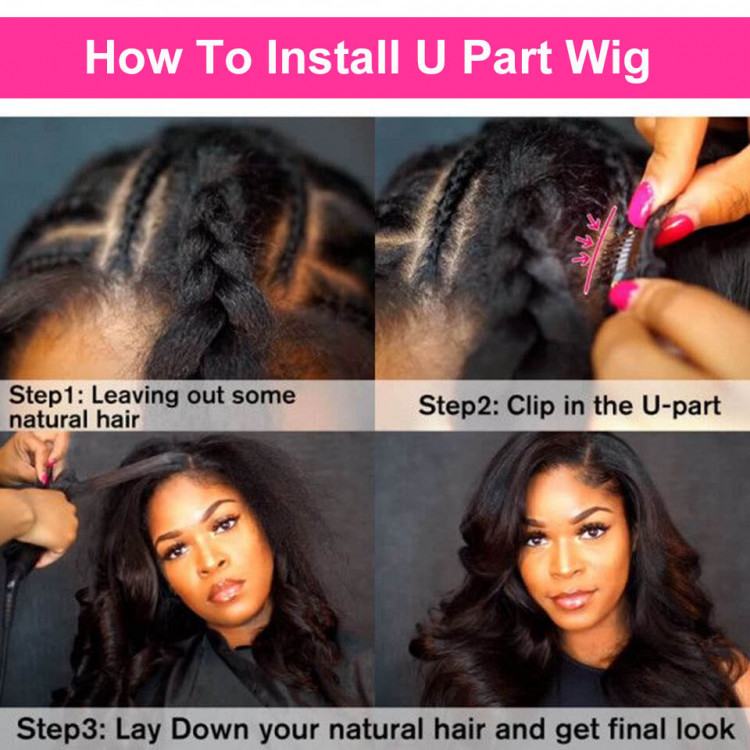
Step 1: Getting started
Depending on the size of your head, the U-part wig can be adjusted to the opening of the “U” shape. Don’t rush to put the wig in as soon as you get it. You can test it on your head before deciding whether to wear it in the middle or side of your head.
Determine the opening size of the “U,” or how much hair you need to leave out, based on the size of your head (make sure the wig fits the back of your head).
Step 2: Take it section by section
Take a little section of your natural hair in the front and on both sides of your edges. These are also known as “baby hairs”. Next, create a ponytail with the remainder of your hair and fix it with bobby pins.
Note: We advise cornrowing your hair down around the leave-out if it is longer than shoulder length.
After that, you can begin the standard steps involved.
Step 3: Clipping the wig down
Next, clip the wig down wherever there are clips, making sure that it sits flat on your head. A good starting point is from the middle of the u-part.
Step 4: Hiding the edges
Now you need to hide the edge of the wig’s u-part opening. Simply flat iron each section of your leave-out down in the desired direction.
Step 5: The final setting
Finally, flat iron your natural hair and wig hair together to create a flawless mix.
You can, of course, watch this video for further information on how to wear a U-part wig. There will be many people who can learn better from looking at and following visuals. We advise you to do more research on U-part wigs. So many people around the world use them in unique ways. You never know what tips and tricks you can pick up just from watching other people. The more you know, the easier and more flawless will your techniques be!
With these steps, you can create any look that you want. The best part is that because U-shaped wigs are so versatile, you can use your own hair to make them look that much better.
As we said before, you can also watch some videos to better learn how to work with these wigs. There are endless possibilities for how your hair will look when you have this wig on! Plus, the added volume that this will give you is unbelievable.

U-part vs. Lace front: the pros and cons
First things first: the decision on which wig is best for you will always be yours. We are just here to guide you in weighing the advantages and disadvantages of all your alternatives.
However, choosing between a lace front and a U-part wig might be a little challenging. On the one hand, lace fronts are an excellent choice for anybody seeking complete natural hair covering, but depending on how they are placed, they could also result in traction alopecia at the edges.
A U-part wig can offer you a more natural-looking finish, but styling your leave-out with hot tools can cause heat damage and breakage.
These are all essential factors to consider. However, to help you make up your mind, here are some pros and cons of each.
Lace front wigs
Lace front wigs: pro
You can cornrow your natural hair beneath and use the piece for full coverage. Lace front wigs can indeed be useful for anybody wishing to use the hair as a protective style. They also allow you to entirely change up your hairdo because they sit so close to the hairline. It can be hard to tell that you’re wearing a wig at all depending on the quality of the wig.
The biggest pro is that lace front wigs, depending on the quality, are seamless. Meaning, that no one can tell you’re wearing a wig.
Lace front wigs: Con
The wig itself has many benefits, but depending on how it is worn, it could harm your hairline.
You must also tread cautiously while tweezing the hairline and scratching your scalp when it is applied. Your hair naturally sheds, and if you over-tweeze, you may need to replace the entire wig or the frontal area if it gets too thin. Also, avoid using sharp things to scrape your scalp because they can easily pierce the lace front.
U-part wig: pro
U-part wigs offer greater flexibility when it comes to sectioning out your hair. They frequently produce a more natural-looking result. Additionally, you are able to choose how you want to style your edges.
Additionally, you are able to choose how you want to style your edges. They’re a terrific alternative for anyone who wants to lengthen their hair as well but wants to take a break from weaves or wants the freedom to remove their hair with ease at the end of the day.
When it comes to storage, maintenance, and hair care for U-part wigs, the same rules apply to lace fronts.
U-part wig: con
You must be careful not to put too much pressure on the scalp when clipping in the wig since this can potentially induce traction alopecia. You should also consider the size while choosing your wig.
Another disadvantage is that using hot tools frequently to blend your hair with the wig may give you a more natural finish because your hair is left out, but it may also cause serious heat damage, breakage, and split ends. So it’s important to understand how to manage hair without applying a lot of heat.